Renovations are necessary to make your spaces look younger. It might be exciting to begin a restoration around your house, but it could also be risky for your lovely wood floors. Meticulous planning is necessary to navigate the complexity of these tasks to protect wood floors during renovation.
How to protect wood floors during renovation is a common concern for homeowners who want to maintain the quality and longevity of their investment. From dust and debris to heavy tools and spills, multiple threats can arise during construction. Implementing proven strategies ensures your floors remain flawless throughout the project.
This blog will discuss certain ways to safeguard your wood floors from damage and maintain their classic appeal during remodeling and construction.

Why Protecting Your Wood Floors during Renovation Matters
While wood floors are known for their durability, they are surprisingly vulnerable during construction work. Protecting hardwood floors during construction means avoiding common damage types such as scratches, dents, paint spills, dust accumulation, and impacts from dropped tools. Repairing or replacing damaged wood flooring can be costly and disruptive, often delaying project timelines and increasing overall renovation expenses. Safeguarding your floors from the outset ensures long-term cost savings and preserves your property’s resale value.
Strategic Timing: When to Install and Protect Wood Floors
The timing of wood floor installation is crucial for minimizing risks during renovation. Ideally, floors should be installed in the decorating phase, after “wet trades” like plastering and rendering are completed. This reduces exposure to moisture and construction debris. However, if your floors are already installed, protecting hardwood floors during construction with proper coverings is essential to avoid irreversible damage.
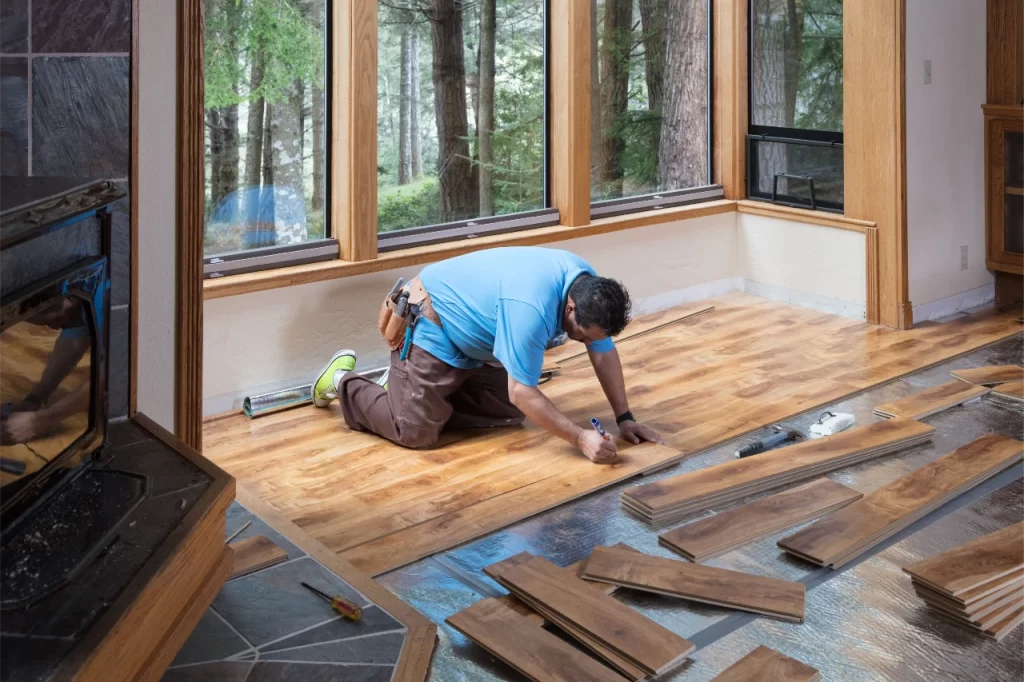
Essential Methods to Protect Wood Floors during Renovation
Choosing effective protection methods ensures your wood floors remain unharmed throughout the renovation process.
Cover the Floor Before Starting
You must protect your precious flooring first before beginning any renovation work. Covering the whole floor before starting any construction work is one of the most basic yet incredibly effective precautions. Put down plastic sheets or clothes to provide a barrier that will shield the area from dust, dirt, and any scratches. This preventive measure not only protects your wood floors from harm but also makes cleaning easier when renovations are finished. You can protect wood floors during construction and maintain its lifespan by taking the time to cover the floor before.
Temporary floor coverings are a powerful line of defense. Floor cardboard like RamBoard offers heavy-duty protection with Spill Guard technology to repel liquids. Masonite is excellent for high-traffic areas, providing robust support when moving heavy items. Construction paper (rosin paper) works well for lightweight coverage; though pairing it with hardboard is advised to prevent tearing and stains. Adhesive floor protection films such as Carpet Shield are ideal for carpets, offering puncture resistance ensure the product suits your flooring type.
Use Painter's Tape
How to paint wooden floors may be an easy task. But keeping your spaces clean throughout the process might be hard. Using painter’s tape is an easy and sensible way to protect your precious floors while doing renovations. This adaptable tape can be used to create a barrier of protection around the floorboard and baseboard because of its soft adhesive construction.
Its adhesiveness guarantees a firm grip without spreading or harming surfaces. Painter’s tape is a solid barrier against accidental paint drips, splashes, and scratches that frequently occur during construction work. This affordable and simple product streamlines the cleansing procedure while maintaining the beautiful look of your wood flooring. Never use painter’s tape directly on newly finished hardwood—apply it to baseboards instead for safe adherence. Painter’s tape is an extra thing that you can add to your restoration kit to protect wood floors during renovation and make sure they survive the whole process.
Plan a Walking Route in the Home
Creating a walking route around your house is a smart way to protect your floors during renovations. Determine a defined path that reduces traffic across the sensitive locations before beginning any construction work. This careful design lowers the possibility of scratches and other damage from frequent movement which prevents unnecessary wear and strain on the wood flooring.
Indicate the chosen route for the sake of both family members and employees by using temporary floor coverings or noticeable signs. You can save your wooden flooring and ensure a more efficient reconstruction procedure by trusting the entire process with a reputable Wood flooring company in UK. You can handle construction difficulties without compromising the integrity and beauty of your wood flooring by proactively designing a walking route.
Minimize foot traffic on unprotected areas by designating and communicating specific walking routes. Remove obstacles, lay protective coverings along paths, and use adhesive mats like DirtGrabber or Step n Peel Clean Mat at entry points to trap dirt. Encourage the use of disposable shoe covers for added protection.
Clean up Quickly
Quick cleansing is crucial to protecting your beautiful wood floors through upgrading. Dust, dirt, and spills will harm the sensitive surface. To remove these contaminants from the working area, sweep or vacuum it often.
Immediately mop up spills with a moist towel. Keep the application of water down; too much of it can damage the wood. You can protect your wooden floors from stains, scratches, and general wear and tear by including a quick cleanup schedule in your restoration plan. This simple yet efficient solution keeps your flooring looking beautiful while also reducing the stress of How to clean wood floors.
Seal the Rest of the Room
Seal the remaining portion of the space as a necessary safety precaution to protect your flooring during restorations. By separating the work zone from the rest of the room and enclosing it with plastic sheeting or temporary walls, you can establish a protective barrier. By using this isolation technique, the amount of dust, debris, and any harm to the nearby wooden flooring is reduced. You can preserve the structural integrity of your flooring and make cleaning easier. This easy yet effective measure promises right solutions for your worries on How to protect wood floors during renovation.
Protect Against Heavy Construction
Protecting wooden floors from the effects of intensive construction activity is crucial during restorations. Put preventive measures in place, such as covering the flooring with thick plywood sheets. This substantial wall protects against the weight and possible harm from large instruments or construction materials and enables renovation time wood floor protection. When moving significant things, prioritize using furniture sliders or pads to reduce friction and avoid scratches. These will reduce the impact of heavy construction on your floors to a great extent.
Heavy-duty protection involves layering: start with felt underlayment for vapour control, add plywood or hardboard for support, and top it off with high-density cardboard for impact absorption. Follow the best ways to protect wood floors during construction by seal all joints with duct tape to prevent liquid infiltration and use furniture sliders or pads to move heavy items safely.
Maintaining a Clean and Well-Ventilated Work Site
Despite protective measures, dust and debris can still accumulate. Regularly clean using shop vacuums and mops, and dispose of large debris in heavy-duty trash bags. Clean up spills immediately to prevent stains and maintain indoor air quality with fans that help ventilate and create a dust barrier.
Choosing the Right Floor Protection Materials: An Overview
Each protective material serves different needs. Cardboard is cost-effective and strong, Masonite offers durability, rosin paper is budget-friendly but fragile, and adhesive films provide quick installation. Avoid black plastic corrugated sheets, which can trap moisture. For expert advice and premium floor protection solutions, contact Trade Flooring UK to the best-engineered wood flooring company UK.
Common Mistakes to Avoid When Protecting Wood Floors
Avoid using low quality or inadequate protective materials, and ensure full coverage in high-risk zones. Never neglect ventilation, and stay clear of black plastic sheets, which may damage your floors due to trapped moisture.
Conclusion
Some easy but powerful precautions are required to protect wood floors during renovation. These safety measures, which include marking walking paths, sealing rooms, and covering the floor with painter’s tape, protect the strength and visual impact of your flooring. Knowing how to protect wood floors during renovation can save you from unnecessary damage and ensure your flooring stays in top condition throughout the process. Protecting hardwood floors during construction is about proactive planning, selecting the right materials, and consistent maintenance. Follow these strategies to avoid costly repairs and maintain the beauty and longevity of your floors. We, at Trade Flooring UK, provide an extensive range of wood flooring services to make your spaces shine with elegance. With our assistance and guidance, you can keep your floors beautiful forever. Let’s preserve the young look of your wooden floors forever with these effective measures.
For personalized solutions and expert flooring services, get in touch with Trade Flooring UK, your trusted partner in premium flooring protection.